REVIEW · LONDON
Private Tour: Night Photography Tour in London
Book on Viator →Operated by London Photo Tours and Workshops · Bookable on Viator
London at night looks better with a plan. This private tour helps you slow down, aim well, and learn night photography techniques on London’s most photogenic stretches—South Bank, the Thames, and the skyline near Westminster. You get hands-on coaching from a Fine Art photographer who works with your camera so you’re not left guessing.
I love that the teaching is private and tailored, not a one-size-fits-all lecture. I also like that the route hits real photo setups: reflections on the Thames, rotating and glowing sights around the London Eye, and night-trail light streaks from traffic. One thing to consider: it’s a walking tour with short stops, so if you want long time at one single spot, you may feel slightly rushed.
In This Review
- Key highlights to know before you go
- Night photography in London, without the “where do I stand?” stress
- Price and what you’re really paying for
- How the 3-hour flow works (and why short stops can help)
- Before you step out: bring the right gear (not just a camera)
- Stop 1: South Bank for Big Ben, the Houses of Parliament, and London Eye skyline glow
- Stop 2: London Eye rotation practice and slow exposure experiments
- Stop 3: Thames river views toward Jubilee Bridge and reflection-building
- Stop 4: Golden Jubilee Bridges for framing from above and skyline stacking
- Stop 5: Royal Festival Hall and night action photography in the skate park
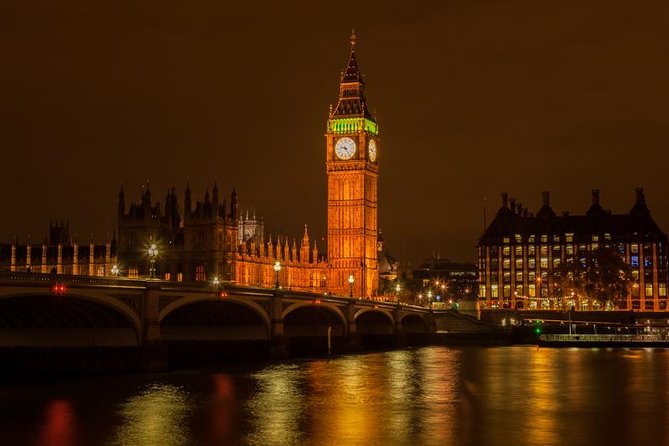
- Stop 6: Big Ben from across the river for mood and atmosphere
- Stop 7: Houses of Parliament for history in a contemporary night frame
- Stop 8: Westminster Bridge for light trails from traffic
- Stop 9: Victoria Embankment for London Eye symmetry and movement cues
- The photo review and what to do after the tour
- Who this private night photo walk is best for
- Should you book this private night photography tour?
- FAQ
- FAQ
- How long is the night photography tour?
- What’s included in the tour price?
- Is the tour private?
- Do I need to bring my own camera?
- Is a tripod required for night photography on this tour?
- Does the tour run in bad weather?
Key highlights to know before you go
- Private, camera-based instruction so you practice with your exact setup
- South Bank to Westminster for skyline views that actually photograph well after dark
- Slow exposure lessons in context, from the London Eye to the bridges
- Framing and composition from multiple angles, including elevated bridge viewpoints
- Hands-on guidance plus feedback, helping you improve rather than just shoot
- Lou and the teaching style show up again and again in reviews: calm, patient, and setting-focused
Night photography in London, without the “where do I stand?” stress
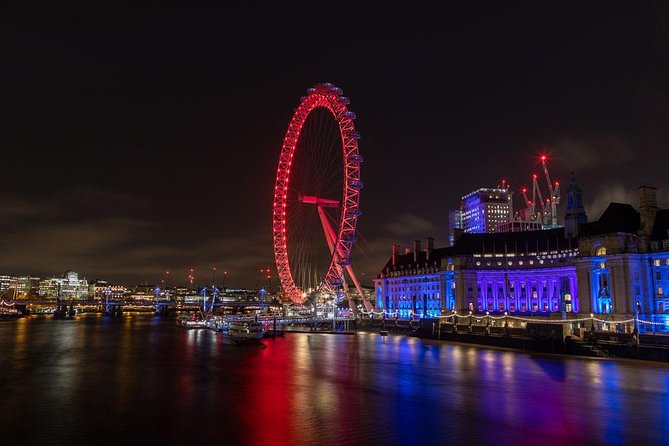
London nights can feel forgiving—streetlights everywhere, famous silhouettes everywhere—but camera settings still trip people up. That’s where this tour earns its place. You’re not just walking to pretty buildings. You’re getting instant coaching at the exact moments you need it: when the light changes, when reflections appear, and when you’re trying to turn city glow into a photo that looks intentional.
The format matters too. This is a private tour exclusive to you or your personal group, and that changes the pace. Instead of sharing attention, you can ask questions, test settings, and get corrections while you still see the scene. Reviews repeatedly mention Lou’s hands-on help with camera settings, and her calm, patient style. That’s the difference between leaving with a few decent shots and leaving with techniques you can repeat.
The other big win: the route is built around “night photography problems” you can actually solve. You’ll practice slow shutter ideas for the London Eye, learn how to make light trails with traffic, and work with reflections on the Thames. Even if you’ve shot at night before, you’ll likely spot new angles and better ways to frame.
You can also read our reviews of more private tours in London
Price and what you’re really paying for
At $337.60 per person for about 3 hours, this isn’t a bargain-basement group stroll. But it’s also not a “pay extra just for a guide to walk with you” situation.
Here’s what you’re buying:
- A pro photographer who teaches (not just points and poses)
- Tailored instruction geared to your camera
- Photo review and skills development so the lesson sticks
- A route designed for night skyline photos, not random sightseeing
Because it’s private, your per-hour value increases if you’re the type who wants to learn fast. If you already know exactly which settings you want and you just want great photos, you might do fine with a self-guided plan. But if you want clearer results and better control over how your night shots look, paying for coaching tends to make sense.
Also note the practical angle: the tour runs in all weather conditions, and that matters in London. If rain or wind would normally kill your plans, having a guided approach and prepared viewpoints can save your evening.
How the 3-hour flow works (and why short stops can help)
The tour moves in a loop from London Eye Waterloo Pier and ends near Westminster Station. Stops are deliberately time-limited—think 15 to 45 minutes—so you cover key compositions without losing the best light patterns.
That short-stop style is actually useful for night shooting:
- Night light shifts quickly, especially around illuminated attractions
- Different scenes need different camera choices (and you can’t “learn later” if you miss the moment)
- You practice framing and shooting, then you reset and try again
If you’re a beginner, that rhythm can feel fast. If you’re intermediate, it often feels perfect: you get a target setup, coaching, and time to run experiments. One review even noted this is best suited for intermediate photographers, but beginners can still learn a lot—especially if you start ready with your camera settings basic.
Before you step out: bring the right gear (not just a camera)
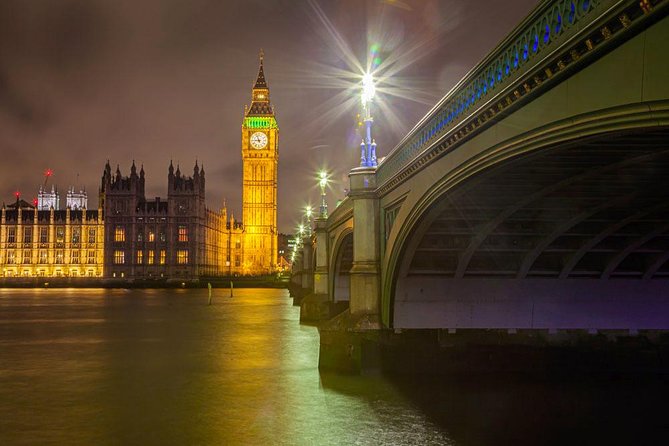
This tour is for compact cameras through DSLR systems, and it works across skill levels. Still, night photography punishes weak batteries and low storage.
Bring:
- Your own camera
- A fully charged battery and/or spare battery
- Extra memory cards
- Dress for real weather (it operates in all conditions)
A tripod is recommended for night shots. If you want to travel light, you can hire one through the operator after booking—one review specifically praised how helpful the tripod rental was for getting great results without lugging extra gear.
Also, do a quick mental reset before you go out: at night, you’re mostly chasing consistency. That means steady framing, controlled exposure choices, and a little patience while the scene locks in.
Stop 1: South Bank for Big Ben, the Houses of Parliament, and London Eye skyline glow
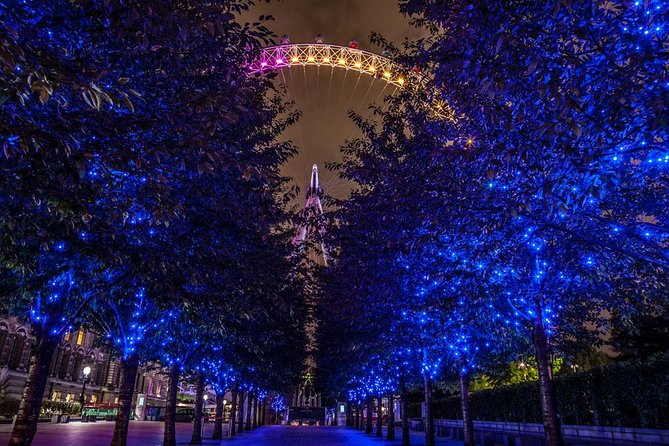
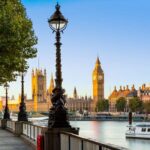
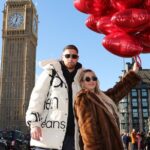
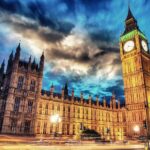
You start on the South Bank area with iconic sights stacked up in one view: Big Ben, the Houses of Parliament, and the London Eye dominating the skyline. This is a smart first stop because the composition possibilities are endless, and you can warm up with guidance.
Expect coaching on:
- Night composition—where to place the skyline elements in your frame
- How to use the light from major landmarks to guide your exposure
- Practical focus and camera-handling habits so your images don’t get muddy at night
You’ll also get a feel for how to work with “luminosity” in scenes like these—how illumination can look clean or blown-out depending on your approach. The good news: you’re not left to figure it out alone. A pro Fine Art photographer with extensive teaching experience is there with tips you can apply on the spot.
How this helps you: South Bank sets your baseline. You learn the “rules of the night” early—then every later stop becomes easier to understand.
A possible drawback: because this area is famous, you’ll see lots of people and activity. If you prefer wide, empty frames, you may need to experiment with angles and wait briefly for cleaner sight lines.
You can also read our reviews of more evening experiences in London
Stop 2: London Eye rotation practice and slow exposure experiments
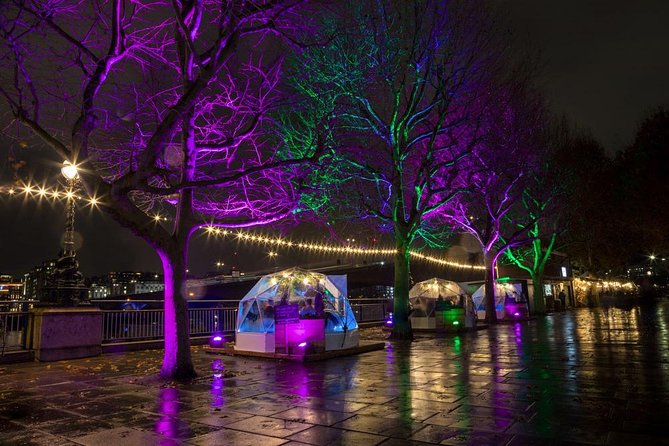
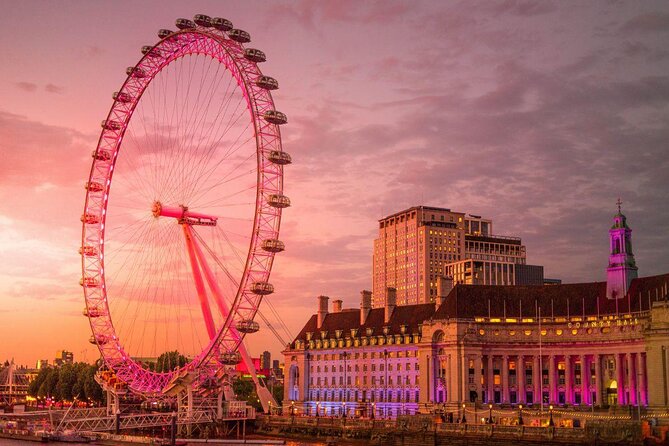
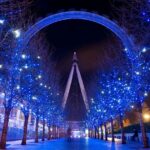
Next comes the London Eye, and the tour gives you an explicit goal: help you make the Eye look alive in your photos rather than just sharp and static.
Here’s what you’ll work on:
- How to set your camera for slow exposures
- How different exposure times change the look of the structure
- Shooting from different viewing angles so you don’t end up with the same postcard frame everyone else has
During warmer months, the tour also mentions focusing on blue hour, low light, and twilight. Even if you don’t control the exact time of day, that guidance helps you understand what to watch for—when the sky transitions and how that affects color in your final images.
One of the most valuable parts here is the teaching style. Reviews highlight Lou helping with settings on people’s cameras. That’s exactly what you want at the London Eye: you’re experimenting with shutter speed, and you need quick, correct feedback while you can still try again.
Stop 3: Thames river views toward Jubilee Bridge and reflection-building
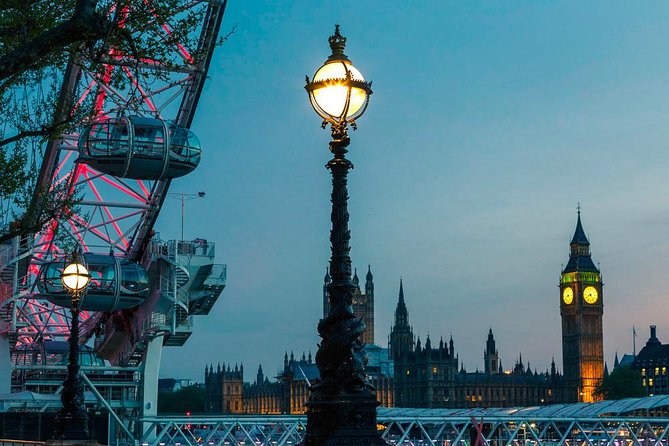
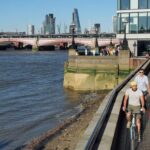
After the Eye, you walk toward the Thames route near Jubilee Bridge. This stretch shifts you from “iconic monument photography” into “river photography,” which is where a lot of night images go from nice to memorable.
Expect:
- Views of the River Thames and Westminster
- Lessons on photographing people and places along a lit route
- Guidance on colorful reflections and using long exposures to make the water look smoother
This is where you learn that night photography isn’t only about the buildings. Reflections can become your main subject. The tour pushes you to treat the water as part of the composition, not as background.
Drawback to consider: reflections can be hit-or-miss depending on wind and activity. If the river looks choppy, you may need to adjust your expectations and experiment with framing rather than counting on perfectly glassy surfaces.
Stop 4: Golden Jubilee Bridges for framing from above and skyline stacking
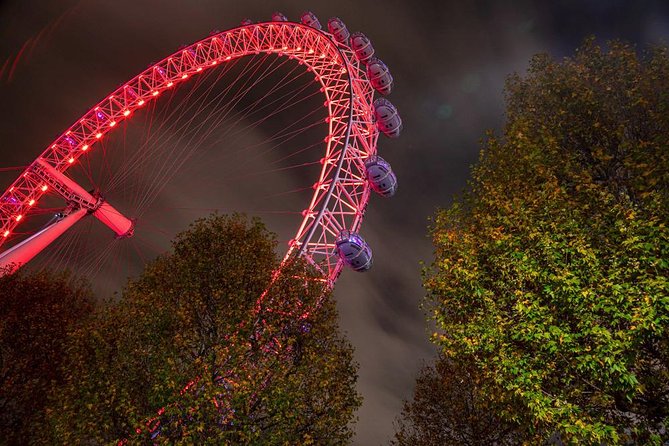
You’ll stop on or near the Golden Jubilee Bridges area for elevated viewpoints. This part is a gift because elevated angles let you layer major sights—westminster buildings, the Houses of Parliament, the London Eye, Big Ben, and even St Paul’s Cathedral—into one image plan.
You’ll learn:
- Framing and composition from an elevated angle
- How to build a shot that includes multiple landmarks without turning it into a cluttered mess
If you’ve ever tried to photograph London’s skyline and ended up with a jumble, this stop is built to fix that. A pro can guide you through selecting what matters in the frame and what to crop out mentally.
Possible downside: bridge areas are exposed. Wind can make it harder to shoot steady. If you’re using a tripod, be smart about placement and stability.
Stop 5: Royal Festival Hall and night action photography in the skate park
This stop adds variety, and it’s a clever one: you move from “architecture stillness” to “action.” The Royal Festival Hall area includes a skateboard park scene.
Here you’ll practice:
- Freezing action (so motion looks crisp)
- Making atmospheric slow exposures to get a different kind of energy
This is a good reality check. Night photography isn’t just skyline and reflections. City life happens at night, and this tour gives you at least one chance to shoot something moving with purposeful technique.
Consideration: action photography usually takes a few tries to land. If you want instant results, plan for some experimentation and don’t assume one take is enough.
Stop 6: Big Ben from across the river for mood and atmosphere
Then it’s back to one of the most photographed spots in London—Big Ben, viewed from across the river. This is where the tour focuses on mood.
You’ll work on:
- Creating atmosphere in a historic location
- Framing and composing so the scene feels powerful instead of flat
- Using the light across the river to make your photo feel like night, not just a dark daylight shot
Big Ben is an obvious target, but the tour approach makes it more interesting. Instead of copying a common angle, you’re shown how to build a mood shot that feels intentional.
A practical note: night shooting is mostly about control. If your shutter speed and exposure choice aren’t aligned with your framing, the shot can look washed out or too dark. Having a coach on hand helps you correct quickly.
Stop 7: Houses of Parliament for history in a contemporary night frame
Next you’ll photograph the Houses of Parliament and connect the historical significance to the contemporary London look. That means you’re not only documenting an iconic façade. You’re learning how to include context so the photo communicates time and place.
Expect coaching on:
- Composition techniques that integrate history with the current city lighting
- How to breathe life into your image through careful framing
This stop works well if you like “storytelling photos.” Even if you’re not writing captions, a good night composition tells a story through light placement and subject hierarchy.
Consideration: this area can also be busy. If you’re trying to remove people entirely, you might need to shoot at angles where crowds don’t dominate, or accept that you’ll capture London’s lived-in feel.
Stop 8: Westminster Bridge for light trails from traffic
Now the tour turns to motion—specifically, light trails from moving traffic. This is one of the most classic night photography effects, and the bridge setup is ideal for it.
You’ll experiment with:
- Slow shutter speeds
- How to capture flowing night trails of light
It’s also a good stop for learning the logic behind long exposures. You’re taking a busy, noisy street scene and transforming it into smooth streaks that read clearly in the final photo.
Practical note: if you use a tripod, the bridge viewpoint can help keep your frame stable. If you don’t, you’ll still have options, but your shutter approach may be more limited.
Stop 9: Victoria Embankment for London Eye symmetry and movement cues
At Victoria Embankment, the tour returns to the London Eye but from across the river, aiming for the full circular experience. This stop focuses on using color and exposure choices to suggest movement.
You’ll learn:
- How to capture the full circular landmark effectively
- How light and reflections create an image that feels dynamic
- How slow exposures can suggest movement even when the subject doesn’t change position much
If you want photos that look like they belong in a gallery instead of a travel album, the lessons here help you refine how the city’s light behaves in your image.
Drawback to consider: getting a circle to look perfect is tricky at night. The coach’s guidance is what makes this stop worth it—otherwise it’s easy to end up with a partially framed or oddly tilted version.
The photo review and what to do after the tour
You’re not just handed a list of spots and sent on your way. The tour includes a review of photographs and how to develop your photography skills. That’s important because the best lesson you can take home is understanding what worked and why.
After a night of shooting, it’s easy to feel overwhelmed by your camera settings and unsure which changes mattered. A review helps you sort that out while the memories are still fresh.
And if you listened during the session (really, do this), you’ll be able to repeat the same process in other cities. Night photography is a transferable skill set.
Who this private night photo walk is best for
This tour fits a wide range, but it shines most when you want hands-on help.
You’ll probably love it if:
- You want a pro Fine Art photographer coaching your settings and composition
- You’re going for skyline and night-trail effects and want consistent results
- You like the idea of multiple viewpoints in one evening without getting lost
- You own any camera type and want instruction geared to it
You’ll still find value if you’re new, but set your expectations for learning-by-doing. One review noted that after three hours of instruction, they moved from shooting everything on auto to taking better night photos on their own. That’s the typical payoff: you gain enough control to keep improving.
Should you book this private night photography tour?
Yes, if you want your London night photos to look deliberate and you’re willing to practice in multiple setups. The combination of a private format, camera-specific guidance, and multiple skyline-focused scenes is the real value here. I especially like that instruction is hands-on and patient—reviews specifically call out Lou’s calm teaching and her help with camera settings.
Maybe skip it if you’re traveling only for sightseeing photos and don’t care about improving your technique. In that case, you might be happier with a self-guided night walk and a few try-and-repeat shots.
FAQ
FAQ
How long is the night photography tour?
The tour runs about 3 hours.
What’s included in the tour price?
You get a professional Fine Art photographer for private instruction, photography walking tour guidance, review of your photographs, and tips to develop your skills.
Is the tour private?
Yes. It’s described as a private tour, exclusive to your group.
Do I need to bring my own camera?
Yes. You should bring your own camera and a fully charged battery and/or a spare battery.
Is a tripod required for night photography on this tour?
A tripod is recommended for night photography. The information says you can contact the operator after booking if you wish to hire one.
Does the tour run in bad weather?
Yes. It operates in all weather conditions, and you should dress appropriately.